Food Photography

lease note that this page contains affiliate links. I will only ever link to products I trust and wholeheartedly recommend. Please let me know if you have any questions about anything listed below, and thank you for your support of Slice of Kitchen Life.

Food is a very emotive subject, one that allows you to engage all your senses. For a food blog, where taste, touch and smell cannot be employed, photography is a powerful tool to communicate those emotions, to make a connection.

Of all the tasks involved in running a food blog, for me photography is the most overwhelming (a very close second? Social media – can someone explain Twitter to me? Please?) There are seemingly countless new things to learn, to puzzle over, to stress about on this journey, but for me, wielding a camera successfully is the most daunting. My learning curve when it comes to food photography is pretty steep – if a curve could be vertical, mine would be.

I have to remember where I came from – just a few months ago I’d barely used a camera. I never carried a camera with me; I’m not someone who took pictures in real life. My starting point involved figuring out how to hold a twelve year old point and shoot camera, let alone how to turn it on, but each time I picked it up, I learned a little more.

Since July 2015, I have been working with the following equipment:
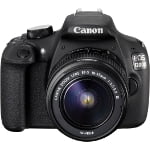
Canon EOS 1200D Camera Canon EOS 1200D (body only) – Upgrading my camera equipment was one of the first tasks on my to-do list. After researching the various options, I chose to invest in the 1200D (body only), also known as the Canon EOS Rebel T5 in the US. As an entry-level DSLR, the 1200D is relatively inexpensive, yet allows you to shoot in RAW format (particularly useful when editing your photos) and is light and comfortable to hold. There are plenty of easy to understand features – there’s even helpful on-screen advice that pops up when choosing settings. Most importantly, for such an affordable piece of kit, it takes great pictures!
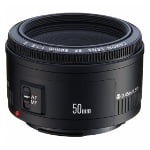
Canon EF 50mm f1.8 II Lens Canon EF 50mm f/1.8 II Lens – Buying just the camera body, allowed me to put the rest of my budget into this food photography friendly Canon EF 50mm lens. It’s what is known as a fixed (or prime) lens, which simply means no zoom feature – you use your feet to move closer or further away from the subject instead. The Canon EF 50mm lens is excellent value for money, with a low f/stop (the f/1.8 in the title) which allows you to create a great bokeh effect – that lovely background blur that helps draw your eye in to the main focus of your picture, i.e. the delicious food.
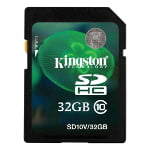
Kingston Technology SDHC 32GB Class10 Memory Card Kingston Technology SDHC 32GB Class 10 High Capacity Memory Card – A digital camera is useless without a memory card, and as I’m shooting high quality RAW format images (at around 24MB each), I need plenty of capacity. This card has enough capacity for over 1000 shots before I need to head to the computer, although I’ve never taken anywhere near this many in a session.
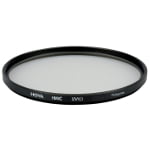
Hoya 52mm UV(C) Digital HMC Screw-in Filter Hoya 52mm UV(C) Digital Screw-In Filter – This handy gizmo screws into the front of the lens and is intended to cut out UV rays. More importantly for me, it prevents dust, steam, and any other debris or contaminants from getting to the lens. The presence of the filter makes me feel a lot more secure using the camera in close proximity to food and steam, especially given the sticky fingers and pinging sauce that often accompany last-minute noodle-arranging!
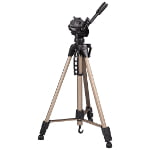
Hama Star 61 Tripod Hama Star 61 Tripod – If you have shaky hands like me, a tripod is a must. Admittedly, the Hama Star 61 is more in the cheap and cheerful range than serious professional kit, but for a beginner food photographer, it does the job and it does it well. Because I’m only using it for my food photography, I leave it set up (tucked away in a corner) when not in use, which reduces wear and tear on the various (plastic) mechanisms. This tripod is lightweight but sturdy, extends to a good height (approx 1.5m) and includes many useful features such as bubble guides (like a spirit level), a weight hook (to add weights to help keep it stabilised – recommended, I use my handbag!) a flip switch to change from landscape to portrait mode for those all important Pinterest optimised shots, and a basic carrying bag.

If you’re serious about improving your food photography skills, one resource I can highly recommend investing in is the Tasty Food Photography eBook by PinchofYum.com. It was the first thing I ever purchased on this food blogging journey – way before even SOKL’s domain name!

For someone whose eyes glaze over when technical terms are mentioned, Lindsay’s style of writing is very approachable (you can tell her previous career was in teaching!). Packed full of clear instructions, and practical tips, there are also plenty of well thought out photographs along with links to helpful videos to explain each point in detail.

From understanding the technical features of your camera to creating an efficient workflow, this eBook is a valuable asset for absolute beginners through to established bloggers looking to improve their food photography. A big thank you to Lindsay & Bjork from Pinch of Yum for creating this incredible resource!

Tasty Food Photography eBook